Twisted on Windows, 2015 Edition
Intro
Installing and configuring Twisted on Windows has gotten easier over the years. Here is how to do it in 2015, using the latest packaging tools.
Twisted runs well on Windows, in my experience. I moved some Twisted applications from Linux to Windows for a client, and they have been running happily for months now without issue.
These instructions have been tested with Windows 8.1 and Windows Server 2012 R2. The applications I run on Windows use Twisted.Web to serve single-page web apps, talking to a database using pyodbc. My ODBC driver is 32-bit, so I’m using 32-bit Python for these instructions. However, Twisted does not depend on pyodbc, so don’t install it if you don’t need it.
These instructions assume that you already have an application that runs on Twisted. The Twisted documentation has a good explanation of how to set up your project so it runs as a Twisted Applicaion. It also includes an nice selection of example applications, if you don’t have an existing Twisted application.
Install Python
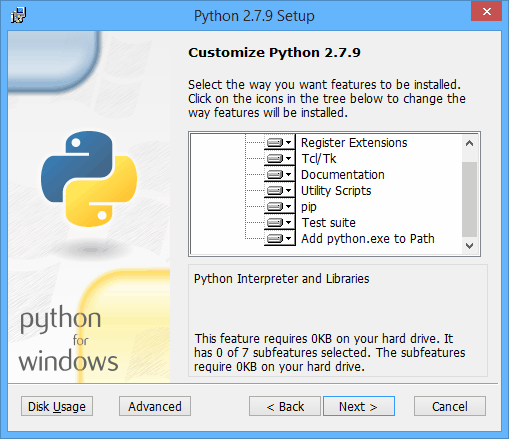
Twisted requires Python 2. Install the latest version of Python 2.7 (direct link to the 32-bit installer). Run the installer, and in the installer dialog, choose the option to add python to the path.
Install a compiler
Some of Twisted’s dependencies have C extensions, and are not available from the Python Package Index in the binary wheel format. So, we need a compiler to compile them from source. This used to be tricky, but fortunately, Microsoft now provides a free download that makes it easy. Download the Microsoft Visual C++ Compiler for Python 2.7. It may have to be installed as admin, to get around policy restrictions on compilers.
Upgrade pip and virtualenv
The Python 2.7.9 installer now includes pip and virtualenv, and sets them up for you by default. However, it does not come with the very latest pip and virtualenv. Here’s how to upgrade them to the latest versions.
Start an admin command prompt. On Windows 8 and newer, Win-x then a is a quick keyboard shortcut to open an admin command prompt.
Upgrade pip to the latest version.
python -m pip install --upgrade pip
Upgrade virtualenv to the latest version.
pip install --upgrade virtualenv
Now close the admin command prompt. We will be installing the rest of the packages in to a virtualenv, and that does not require admin access. The great advantage of using a virtualenv is that it keeps the packages we install isolated from each other, and from the system-wide packages.
Set up a virtual environment
Start a regular (non-admin) command prompt. Win-x then c is a quick keyboard shortcut for a non-admin command prompt.
mkdir C:\PythonEnvs
virtualenv C:\PythonEnvs\Example
C:\PythonEnvs\Example\Scripts\activate.bat
This makes a new directory on the C: drive, makes a new virtualenv, and then activates the new virtualenv. You should see the name of the virtualenv in parentheses at the start of your command prompt, something like this:
(Example) C:\Users\Me>
When a virtualenv is activated, it looks for installed Python packages in its own site-packages directory C:\PythonEnvs\Example\Lib\site-packages, instead of looking in the system wide site-packages directory C:\Python27\Lib\site-packages. Note that we don’t need to be in the virtualenv directory for it to be active.
The virtualenvwrapper project is full of useful shortcuts for working with virtualenvs. For simplicity, I will be using only virtualenv, and not virtualenvwrapper, in this writeup. However, if you’re interested in setting up virtualenvwrapper, this patched version works on Windows with the latest version of virtualenv.
The state of Python packaging in 2015
Installing Python packages on Windows has gotten a lot easier over the years. The Python Package Index (PyPI) now provides pre-compiled binary installers in the wheel format for many packages.
When a wheel is not available, pip can automatically compile C extensions using this compiler that Microsoft provides at no cost.
However, there are still packages that are not available on PyPI. Many are distributed for Windows in the Windows installer format (.msi or .exe). Pip can not install these packages, but there is a way to install them in to a virtualenv.
Install Twisted
pip install Twisted
This will pull the latest version from PyPI. It will also install its dependencies. One dependency, zope.interface, will use the compiler to compile a C extension.
. . .
Installing collected packages: zope.interface, Twisted
  Running setup.py install for zope.interface
    building 'zope.interface._zope_interface_coptimizations' extension
. . .
If you get a vcvarsall error, install the Microsoft Visual C++ compiler.
Install dependencies from PyPI
Install pywin32.
pip install pypiwin32
As of March 2015, pywin32 is available on PyPI in the wheel format. That means it can be installed by pip. Note that in order to get the PyPI version, we must tell pip to install package pypiwin32, not pywin32.
Install dependencies that are not on PyPI
For packages that are not on PyPI, the installation steps are different. If the package is distributed using a Windows binary installer (.msi or .exe) we can use the older easy_install command to install it in to a virtualenv.
One such package is pyodbc, which my application uses to talk to the database. Twisted itself does not depend on pyodbc, so there is no need to install it if your application doesn’t use it.
As of March 2015, pyodbc is not available in wheel format from PyPI. Download the Windows installer. Make sure to get the installer that matches your version of Python and your architecture. I am using this one “3.0.7 32-bit Windows Installer for Python 2.7”.
Use easy_install to install pyodbc in to the virtualenv from the executable Windows installer file.
easy_install --always-unzip C:\Path\to\pyodbc-3.0.7.win32-py2.7.exe
I’ll talk about why we need --always-unzip in Part 3.
Not all installers will work with easy_install this way. See this Stack Overflow question for more details.
Twisted Application
In this series, I’m assuming you have your project structured as a Twisted Application. In that structure, you have a .tac file that is the connection point between your code and the Twisted server, twistd.
Here a basic .tac file, taken from the documentation for Twisted Application.
service.tac
# You can run this .tac file directly with:
#    twistd -ny service.tac

"""
This is an example .tac file which starts a webserver on port 8080 and
serves files from the current working directory.

The important part of this, the part that makes it a .tac file, is
the final root-level section, which sets up the object called 'application'
which twistd will look for
"""

import os
from twisted.application import service, internet
from twisted.web import static, server

def getWebService():
    """
    Return a service suitable for creating an application object.

    This service is a simple web server that serves files on port 8080 from
    underneath the current working directory.
    """
    # create a resource to serve static files
    fileServer = server.Site(static.File(os.getcwd()))
    return internet.TCPServer(8080, fileServer)

# this is the core part of any tac file, the creation of the root-level
# application object
application = service.Application("Demo application")

# attach the service to its parent application
service = getWebService()
service.setServiceParent(application)
If you don’t already have a project that you run under Twisted, the documentation has a nice set of examples to get you started.
Install your application
Whatever Twisted application you are going to be running on this server, install it as you normally would. For example:
pip install my_app
Now that everything has been installed, check it.
pip freeze
should look something like this:
my_app==4.14.2
pypiwin32==219
Twisted==14.0.2
zope.interface==4.1.2
other dependencies here
. . .
Newer versions of some of these packages may since have been released.
If you are installing using pip, make sure your .tac file is included in your distribution file. For exapmple, put this line in your MANIFEST.in file:
include *.tac
Documentation on MANIFEST.in.
Run it
Try it out. Make sure your virtualenv is activated, and type:
python C:\PythonEnvs\Example\Scripts\twistd.py --help
The virtualenv picks up the right Python path, but on Windows we have to specify the full path to the twistd.py file. This command should give you a nice help message and no errors.
Now try running your app under Twisted.
python C:\PythonEnvs\Example\Scripts\twistd.py ^
   --rundir "C:\PythonEnvs\Example\Lib\site-packages\my_app" ^
   --python "my_tacfile.tac"
For readability, I have broken this long command in to multiple lines using ^, the dos line-continuation character.
This command should print out some lines showing the twistd server starting up. Again, on Windows, we have to specify the full path to the app install directory when starting the twistd server. Go try out your app, and press Ctrl-c to shut down the server when you’re done.
Up and running
That’s it for Part 1. We have installed Python, set up a virtualenv, and gotten your Twisted app up and running. In Part 2, we will set up a Windows service to run the app, using the virtual service account that was introduced in Windows Server 2008. In Part 3, we will look at setting the right privileges for the app. In Part 4, we will package the app and its dependencies for deployment to test and production servers. Thanks for reading, and if you have any questions or suggestions, let me know. I’m on Twitter at @christianmlong.